
Appearance
Client 📒
Every person to whom you (i.e. your firm) is provides service is called as client. In simple terms, every legal entity is a client. A client will have a unique legal number/identity (eg In India, PAN is a unique legal number for a Person)
Examples of client
- Individual
- Company
- Partnership Firm
- Trust
In a rare case/ scenario, you may want to create more than one client for a same person/entity. eg: A trust has 3 divisions for which there is separate TAN number (For TDS deduction) and you are providing service of TDS return filing for service that the client then, in that case you will create 3 clients even though the person/entity is same. If in doubt/dilemma as to whether you should create more than 1 client for same person, then feel free to reach out to Support Team of Jamku for better clarity and best practices suggestions.
Fields in Client Master
Following information is stored in Client Master:
- *Client No
10Auto Generated by Jamku - Client ID
10Your Firm Generated Client Number - *Group No
10Link to Client Group - *First name
60 - Last Name
50 - Business Name
50Trade name of client - Legal Number (PAN)
10 - Date of Birth/ Incorporation
Date(YYYY/MM/DD) - Client's birth or company incorporation date - Category
10Internal categorization field - Cost Center
10 - Profit Center
10 - Client Note
63,000Free-form notes about the client
Note
- Number in (eg.
1) indicates number of characters. - * Before the filed name inicates it'a a mandatory field.
- To store Client's password check Password Guide
- To store Client's contact details & other information like GSTIN, Aadhar, check Profile Guide
- To store Client's Digital Signature, Physical File information check Folder Guide
Create Client
Client first name is the only mandatory field, while creating a client. Users having permission MasterData:Yes can create clients.
- Go to Client List & Click on
+ Client
This will open the below dialogue.
Client Group will be created automatically based on the group name provided in Group Name field. 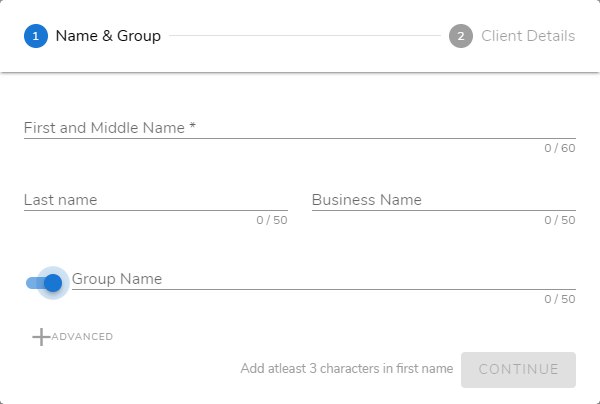
If you wish to create a client for exiting client group, then switch off Group Name select from client Group from drop down. 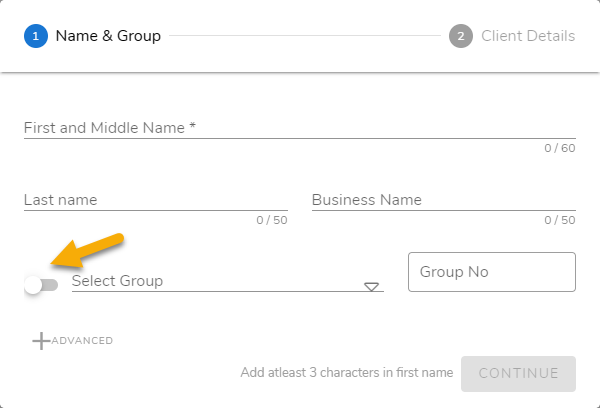
Enter the details and click on Continue.
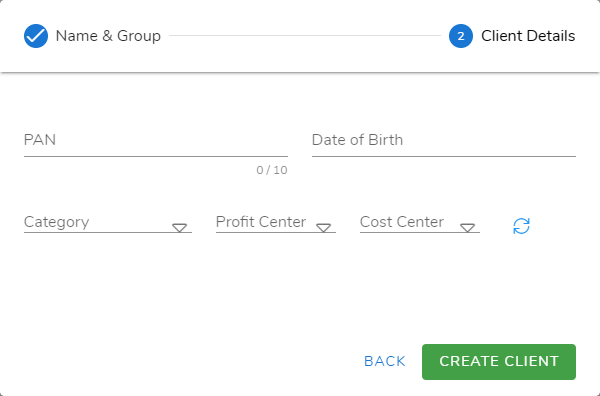
Continue button will be activated only after you enter atleast 3 characters inFirst Namefield.On next screen, enter the other details (all fields in this screen are optional).
Clicking onCreate Clientit will create a client and take you to client view.
View Client
Go to Client List > Click on Client Name or Number. Using Client List is not the only way to open a Client. Clicking on Client Name from anywhere in Jamku will open the client in Client View. This requires MasterData Permission.
Details about how to use client view is available in report section of this guide. Client View
Edit Client
Once the client is created, you can edit all the fields (except Client No).
- Go to Client View > Edit Tab
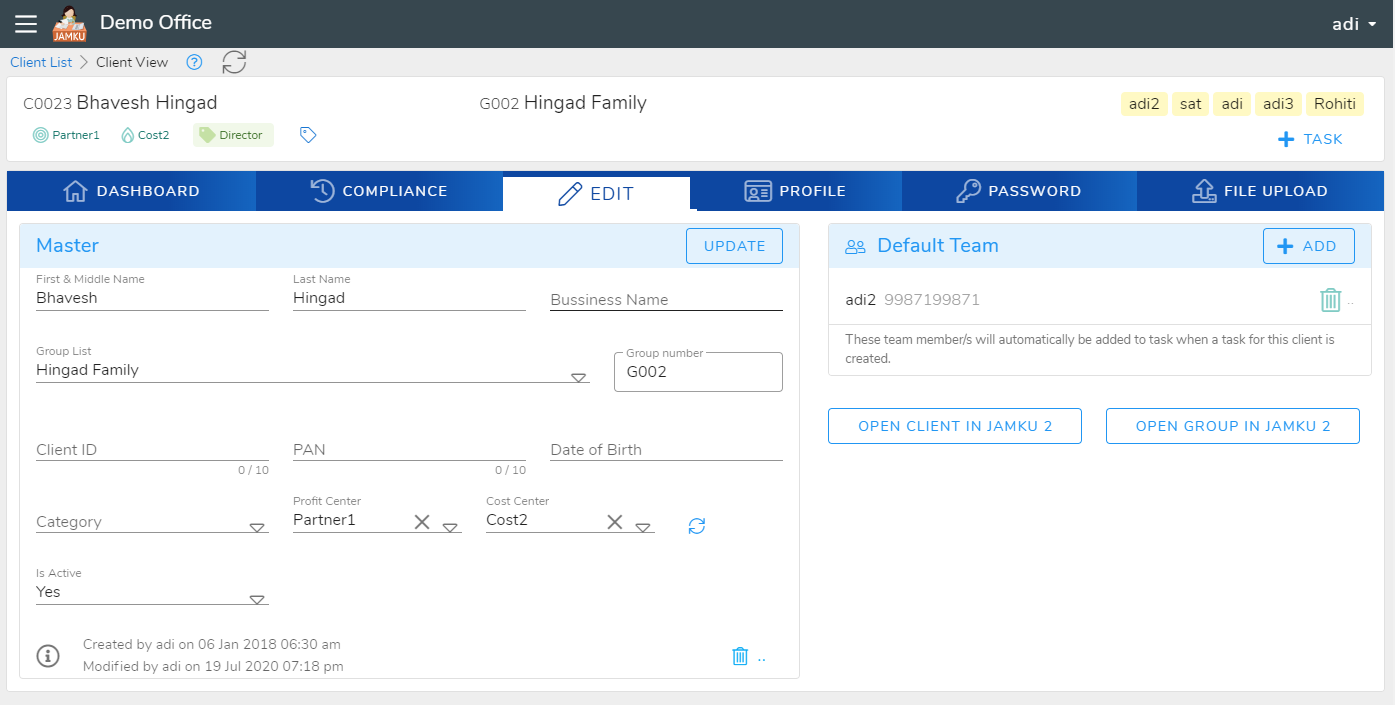
- Update all the fields and click on
Updatebutton on top right of the form.
Deactivate Client
When a Client no longer avails any services from you, simply deactivate the client instead of deleting. This will preserve/save all the data of that client but prevent you from creating a Task for that Client. User can deactivate or activate a client from the respective Client View page under edit tab. To view the list of deactivated clients, go to Client List and select "Deactive" and the list will be displayed on the screen. Deactivated client can be activated again at any time by just one click. User having permission MasterData:Yes can deactivate / activate a client.
To Deactivate a client,
- Go to
Client View>EditTab >MasterCard
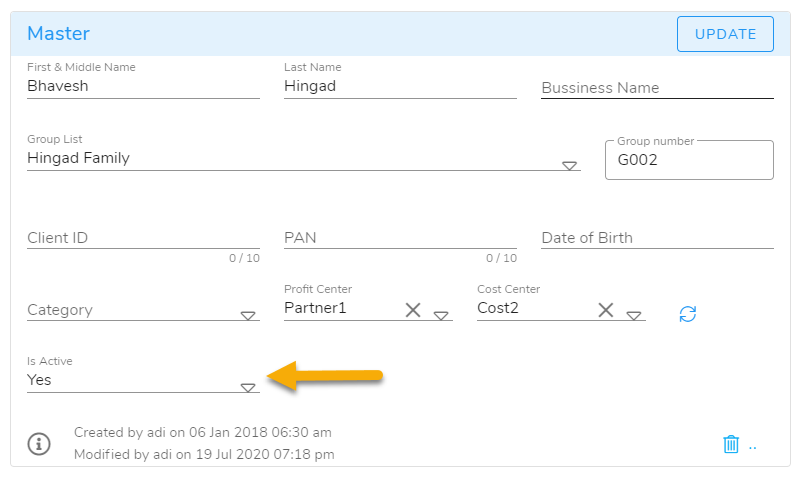
- Set the
Is Activefield toNoand click onUpdatebutton
Delete Client
Instead of Deleting a Client, consider deactivating the client ( more information about Deactivate Client is mentioned above ). If you have created a client by mistake, it is recommended to delete the client.
Jamku stores logs of Client which are deleted. Client cannot be deleted if there exists: Task, Reminder, Uploaded File, Shortcuts, Profile, Password,To do, Sub task etc. User having permission Delete:Yes can delete client.
To Delete a client,
- Go to
Client View>EditTab >MasterCard - Click on
Trashicon
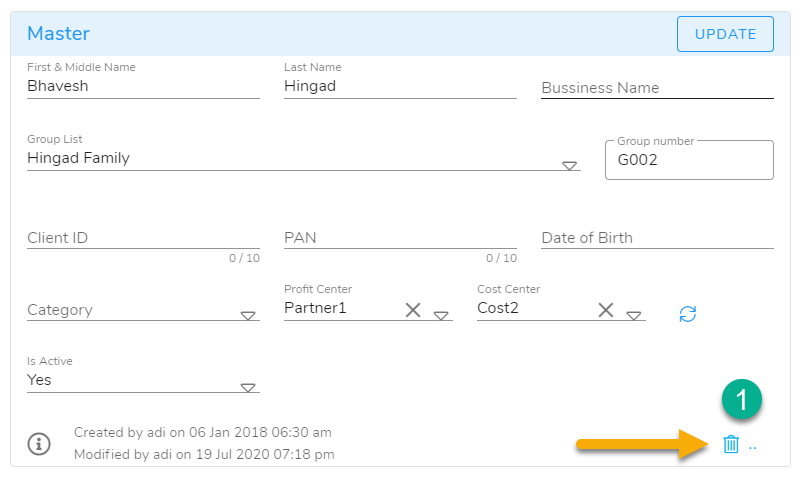
- Click
SureButton

Client Tags
Tags are specifically used for clients. They help classify and categorize clients, making it quicker and easier to filter them. For example, if there is a change in the GST tax rate on gold or silver ornaments, and you want to communicate this update to all your clients in the jewellery industry, you can simply filter those clients using a tag like jewellers.
There is no limit to the number of tags that can be added to a client. Tags can be added or removed from both the Client List and the Client View page. The Client List can also be filtered using these tags. Only users with the MasterData:Yes permission can add or delete tags.
Client Default Team
Scenarios where this can be useful
- A team member acts as a single point of contact for a client, then he could be added to that concerned Client. or
- You want a particular team to work on all tasks pertaining to a client
You can add Team members to client, which will be automatically assigned to all the tasks of that particular client. To add/edit team members visit Client View > Edit Tab.
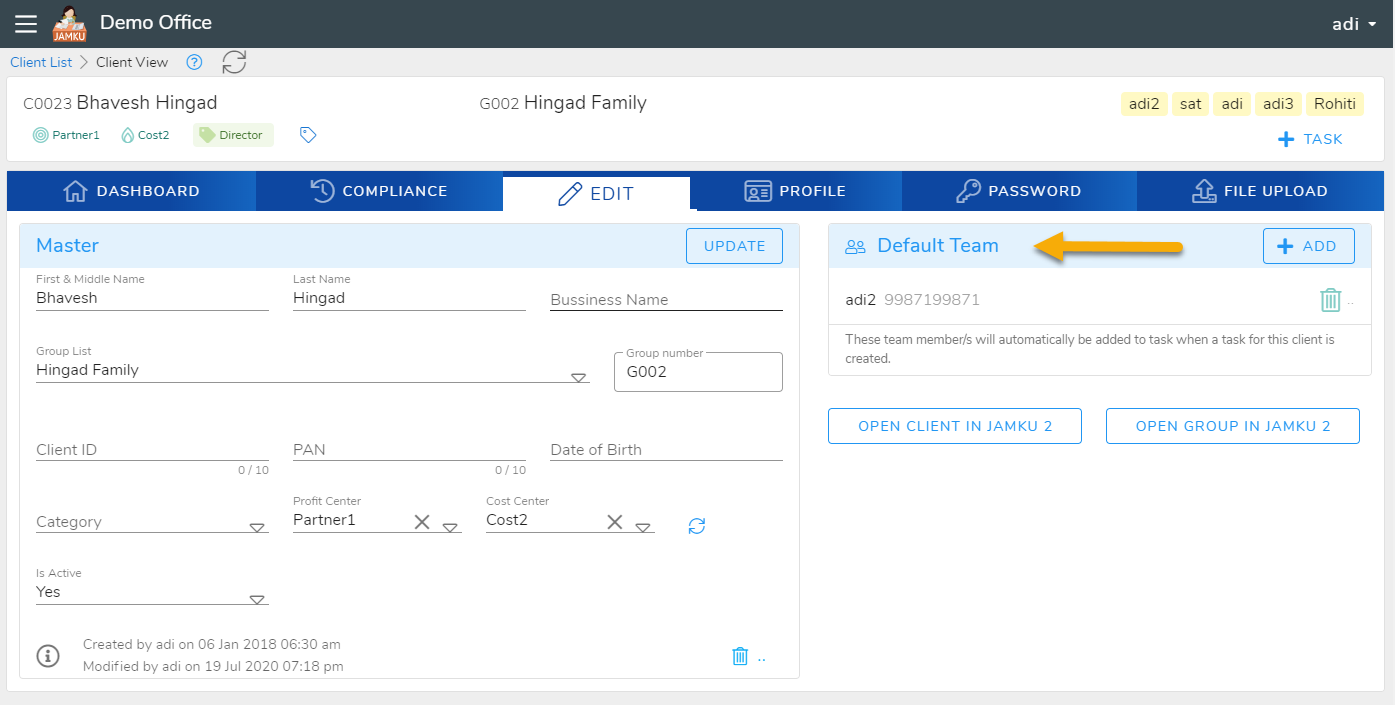
This will affect the tasks that are created after the team member is added to that client. It does not affect tasks which are already created.
Tips 💭
- If clients in your firm are divided between Partners, then use
Profit Centerfor bifurcation of the clients between Partners. - If your firm has branches, then use
Cost Centerfor bifurcation of the clients between Branches. - If a team member is dedicated to a client, add him in Default Team. When a task for this client is created, the team member will automatically be added to the Task.