
Appearance
Excel Integration
Note
The below screenhsots are taken using MS Office 365. If you are using Office 365 or MS office 2019, you will be able to follow along.
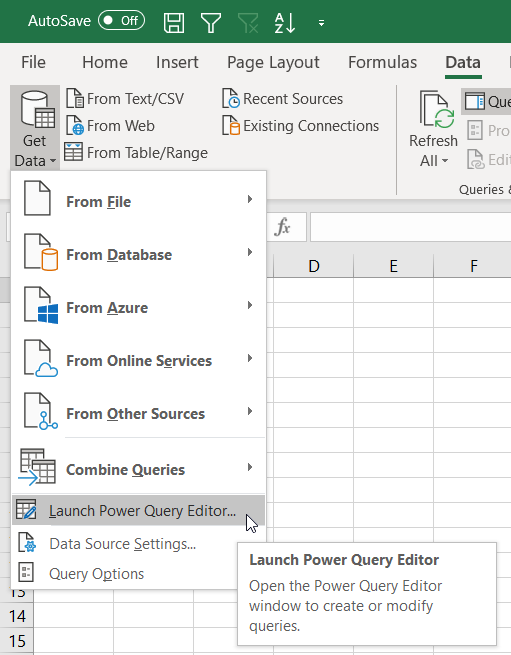
Open Excel 👩🏻💻🧑🏻💻 and Go to Data Ribbon > Get Data > Launch Power Query Editor
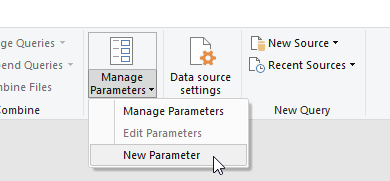
In Power Query Editor > Home Tab > Manage Parameter > New Parameter
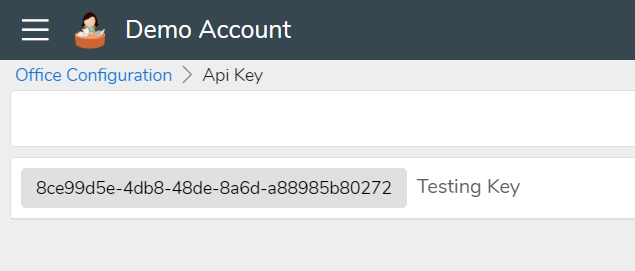
Copy your apiKey from Jamku, we will need this in the next step
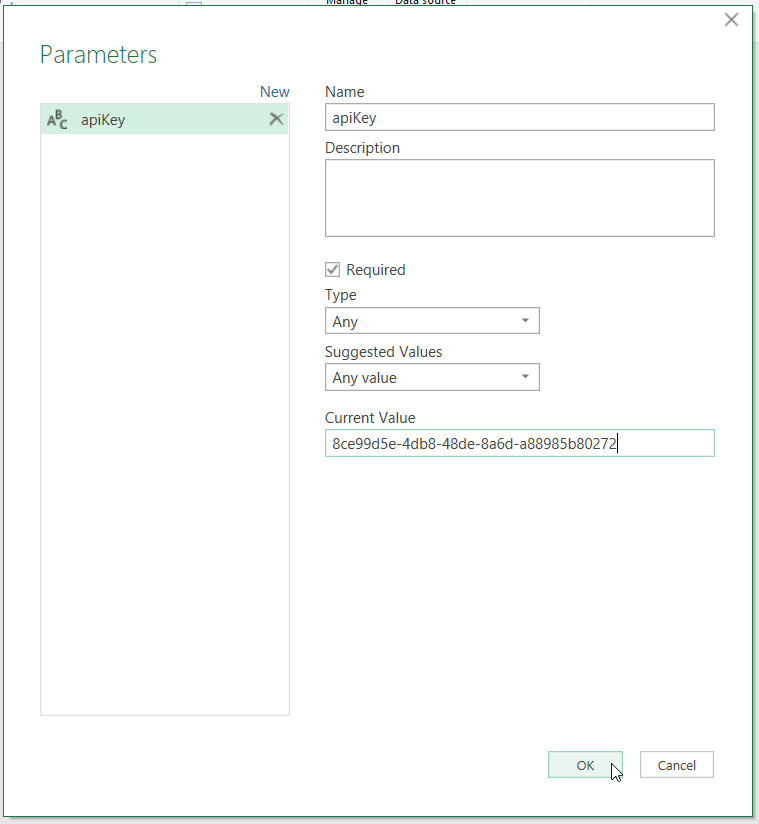
In the Parameter Dialogue Box, enter the below details
- Name: apiKey
- Description: Can leave it blank
- Required: Tick
- Type: Any
- Current Value: apiKey which you copied from Jamku
Click ok to save the Parameter
Go to Home Tab > Data Rource yyyy
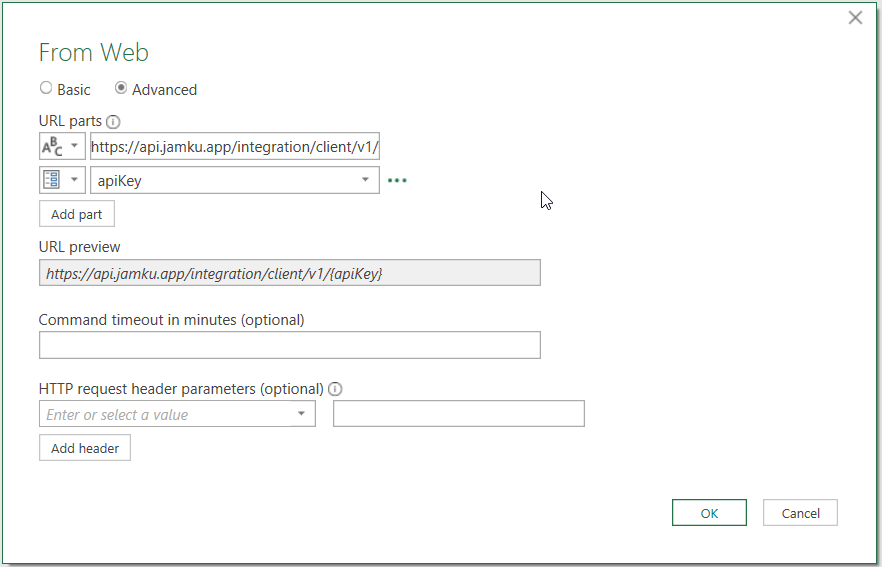
In the From Web Dialogue Box, which opens, click on Advanced & Enter the values as shown
- Url Part 1:
https://api.jamku.app/integration/client/v1/(don't forget the trailing/) - Url Part 2: First Select
Parameterin Drop Down & Then Select the Parameter(i.e.apiKey) which we created in the previous step.
Ensure the URL Preview is same as shown below👇🏻. Click ok, to add the data source.
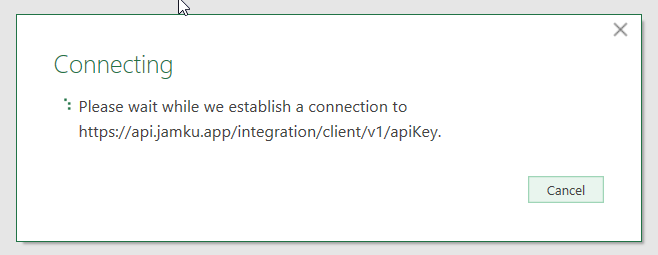
If you are using the latest version of Excel / Power query, then you will be shown a 2nd Dialoge, as shown below. Simply, click Connect to being connection

You will see a processing screen as shown below
Once the processing is completed you will see multiple Record with title List If You don't see many records, then something went wrong with your setup. If you are unable to solve the error yourself, please get in touch with Jamku Support team for help.
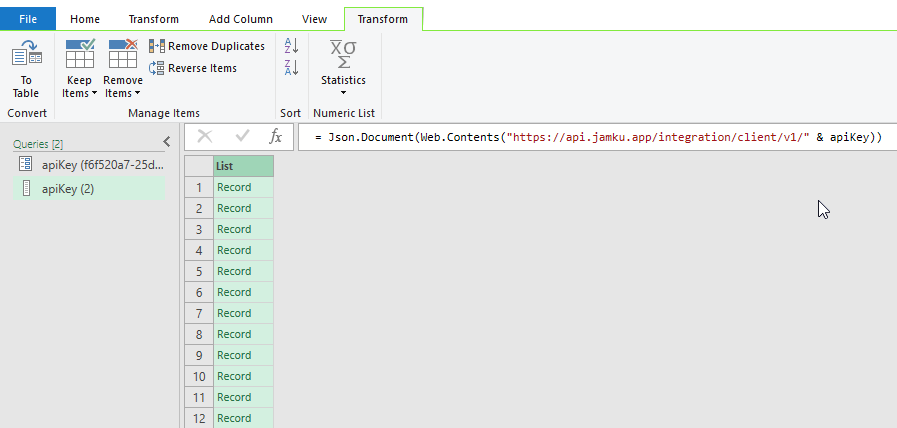
👏🏻Congratulate yourself on getting the data in Excel from Jamku. Now, let's start the data transformation.
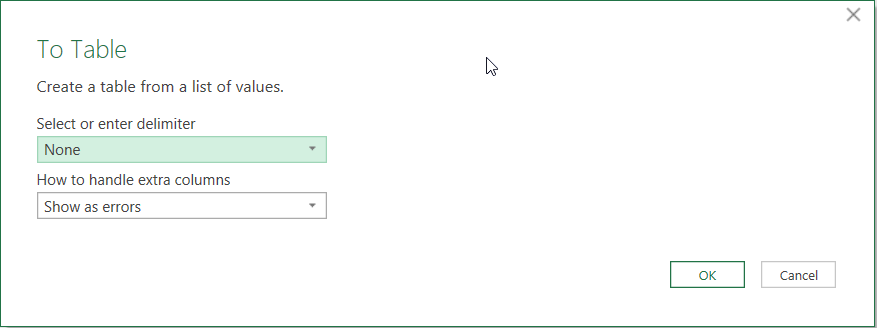
Right Click on List and Click on To Table
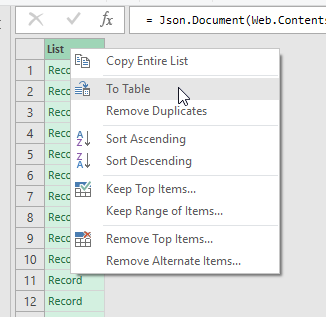
In the To Table Dialogue, click Ok.
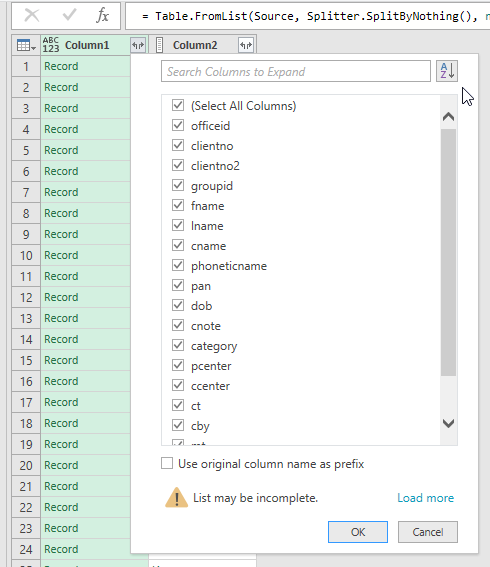
Now you will see a small Expansion button in besides Column1. Click on this button.
In below screenshot, the mouse is at this Expansion button

You will be shown all the field names Excel could Extract.
Don't unselect any columns, here. In the next step we will do it in the recommended way.
Un Check Use Original Column Names as Prefix and click OK.
You will now see all the clients details in the table. Let's select which columns you would like to keep / hide On the Home Tab > Click Choose Columns > Choose Columns
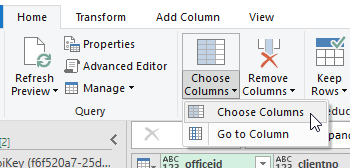
Select the columns which you wish to have it in your report

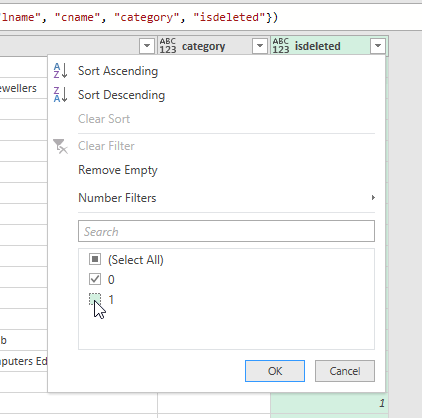
You can also filter only the clients which are active. (i.e. Filter out deactivated clients)
Whatever steps you perform are shown in Applied Steps panel in the right side of the table.
Here, you can also change the connector name. We have renamed it to client.
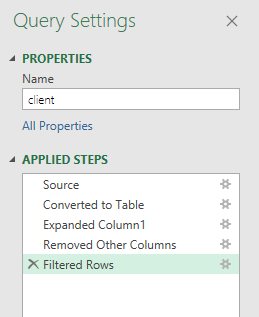
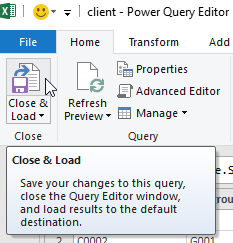
Once you finish all the data transformation, you can click on Close & Load.
It will close the Power Query Editor & take you back to Excel.
You have successfully loaded the data from Jamku to Excel.

The connection to Jamku is stored in the file.
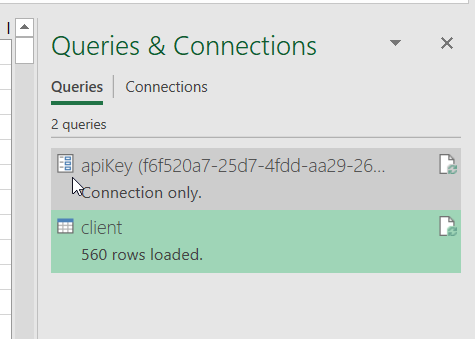
If there is any data changes in Jamku, all you need to do is click on Refresh button in Query Ribbon
